Cryptocurrencies How To Transfer Ethereum From Coinbase To Metamask like Ethereum are all the rage these days. But if you’re unfamiliar with them, that can pose a problem. In this blog post, we will walk you through the process of transferring Ethereum from Coinbase to Metamask. This is one step in the process of getting started with Ethereum, and it’s an important one. By completing this step, you’ll be ready to start trading and mining Ethereum!
How To Transfer Ethereum From Coinbase To Metamask
If you have Ethereum on Coinbase, you can easily move it to Metamask by following these steps:
1. Log in to Coinbase and click on the “Accounts” header in the top left corner of the screen.
2. Under “ETH (Ethereum)”, select “Withdraw”.
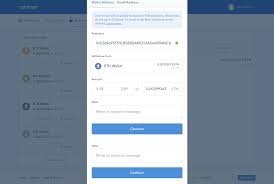
3. Enter your wallet address and click “Withdraw”.
4. On the next screen, enter your Metamask password and click “Continue”.
5. Select the Ethereum network you would like to transfer to (Mainnet or Testnet), and click “Transfer”.
6. Confirm the transaction details and wait for the Ethereum to be sent to your Metamask account.
How to Setup Metamask and Ethereum
1. Visit Metamask’s website and create an account.
2. Download the Metamask Ethereum browser extension and install it on your computer.
3. Open the Metamask extension and click on the “Ethereum” button in the top right corner.
4. In the “Ethereum wallet address” field, input the address that you received when you purchased Ethereum from Coinbase.
5. In the “Token contract address” field, input the address of the token contract that you want to transfer your Ethereum to (for example 0xca9b6f11d8e79d24244b648daa316adc1f68083a).
6. In the “Gas limit” field, input how much gas you want to spend when executing this transaction (in wei). This is important because higher gas limits will allow more transactions to be processed per second, which will speed up your transfers process.
7. Click on “Generate Transaction.”
8. Copy and paste your transaction information into the “Transaction data” field and click on “Send Transaction.”
9. Click on the “Metamask icon” in the bottom left corner of your screen to open the Metamask web interface.
10. On the left-hand side of this window, under “Contracts,” click on “(Your) token contract.”
11. On the right-hand side of this window, under ” Transactions,”
How to Use Metamask to Send and Receive Ether
Metamask is a user-friendly Ethereum wallet that allows users to send and receive ether. To start using Metamask, first create an account at metamask.io. Next, on Coinbase, open the Ethereum app and click on the “Addresses” tab. Copy the address of the ether wallet you want to use with Metamask and paste it into the “To” field in Metamask. Click “Send Ether.” To receive ether, open the Metamask app and click on the “Receive” tab. Paste the address of the ether wallet you want to use with Metamask into the “To” field and click “Receive.”
How to Use Ether in Apps and Dapps
Ether is the second most popular cryptocurrency after Bitcoin. Ether can be used in apps and dapps to pay for goods and services. You can use Ether to buy Ethereum tokens on exchanges, or you can use it to pay other people in apps and dapps.
To use Ether in apps and dapps, you first need to get some. You can buy ether on exchanges like Coinbase or Gemini. You can also get it by mining ether.
Conclusion
If you’re looking to move your Ethereum from Coinbase to Metamask, this guide will show you how. First, make sure that you have both a Coinbase and Metamask account set up. Next, log in to Coinbase and head over to the wallets section. Under “My Wallets,” select “Cryptocurrency.” Click on the ETH button and then copy the full address of the wallet that appears next to “Current Balance.” On your Metamask account, open the web application and click on the three lines in the top left corner. From here, click on Accounts and then Ether Wallet Addresses. Paste the copied ETH address into the Eth wallet address field and hit Send To. Finally, sign in to Metamask with your credentials (Coinbase username + password) and confirm the transaction!